File-sharing best practices in Google Drive
If you’re using Google Drive, then you’re using Google Workspace. Formerly known as G Suite, Google Workspace is a suite of 15 productivity, security, collaboration and communication apps that can all be accessed with one Google-login. You’re probably familiar with Gmail, Google Drive, Google Calendar and Google Meet, all being Workspace apps that are intuitive, convenient, and manageable.

“Collaboration is teamwork, and so is protecting your data.” — Tricent
Document collaboration lets us work closely with others, accelerates creativity and communication, keeps us informed, and much more. But how do you promote and protect your documents at the same time? Creating a safe and secure collaborative environment isn’t a one-man’s job, it’s a shared responsibility between the organization, sysadmins, and the end-users.
However, the end-users know best what files need to be shared, why they share them, and with whom they share them. That’s why it’s important to understand how end-users should protect themselves and their company against any potential data leakages.
In this blog post, we’ll go through the best practices for end-users when it comes to sharing files in My Drive and Shared drives.
File-sharing in My Drive vs. Shared drives
You have two options when it comes to sharing Google Drive files - namely, My Drive and Shared drives.
My Drive is your personal space for storing, searching, and retrieving your files. It’s owned and can only be accessed by you. Shared drives work similarly, except files belong to the teams (or the organization) and can be accessed by multiple users. Sharing files in My Drive or Shared drives works identically, however, how much access others have differs.
File-sharing in My Drive - 5 best practices
You can apply these sharing methods to all your Google Docs, Spreadsheets, or Slides.
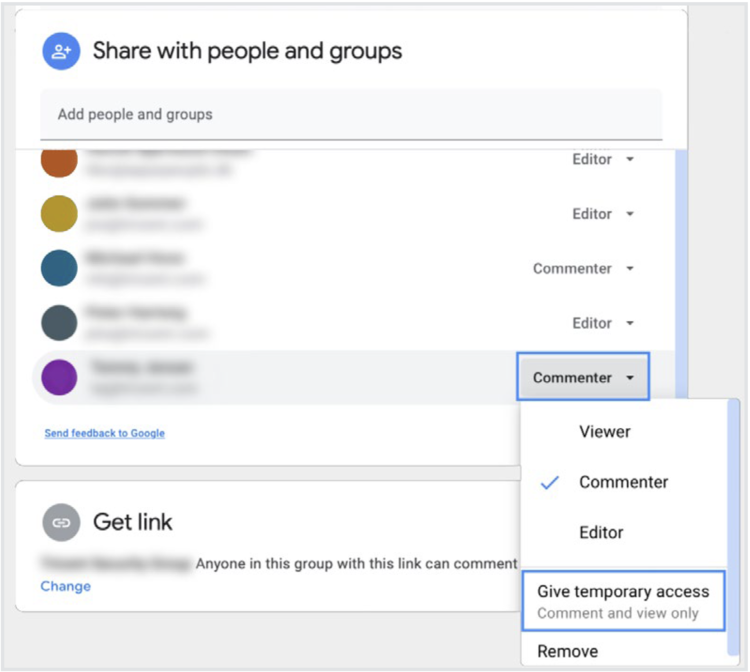
1. Set an expiration date for shared files
Granting collaborators temporary access ensures that no files are exposed longer than absolutely needed.
Click on:
Share > Add people and groups > Enter the recipient's email > Click Share
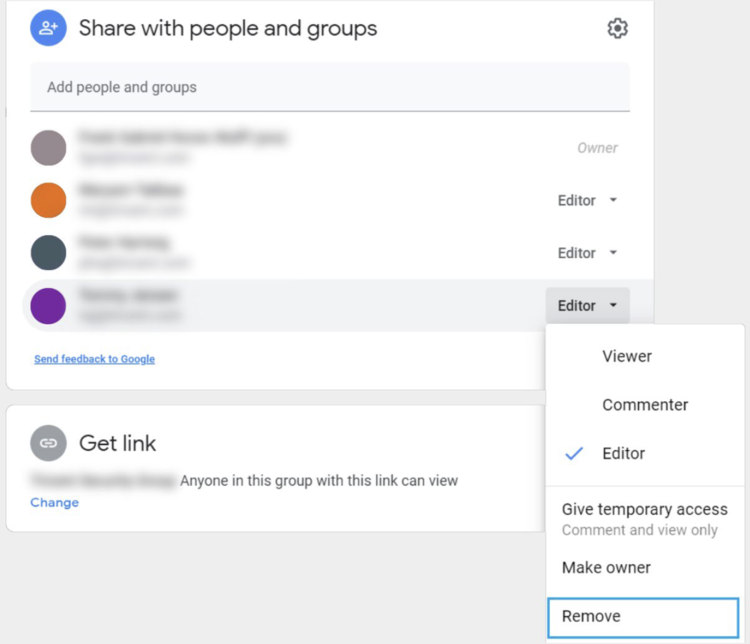
From here you must go back to editing the recipient’s permission, and select “Give temporary access” (see screenshot).

Note:
This feature only works on Viewers and Commenters. Putting an expiration date on an Editor will automatically change their access to Commenter.
You’ll be prompted to set the expiration date as shown in the screenshot.
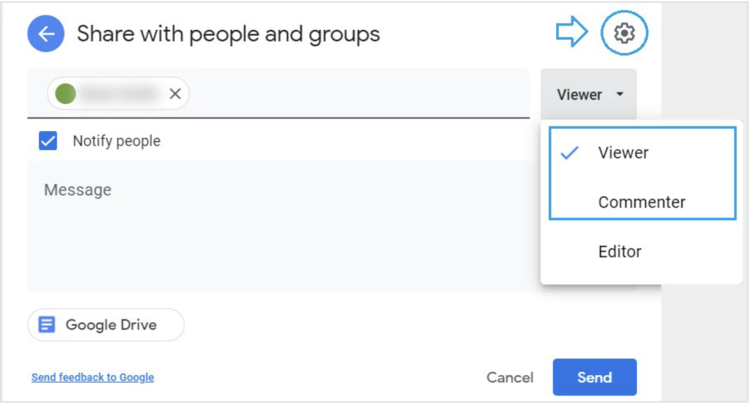
2. Grant collaborators with the least access
This is based on the principle of least privilege, which is a security practice that prevents people from getting more access than absolutely necessary to perform a task or service.
In other words, when file-sharing you must carefully evaluate which rights your collaborators need: editor, commenter, or viewer access. We recommend using the commenter access for most cases, as it allows recipients to contribute with input, yet disallows them to modify your files.
Click on the settings icon to get to the screenshot above.
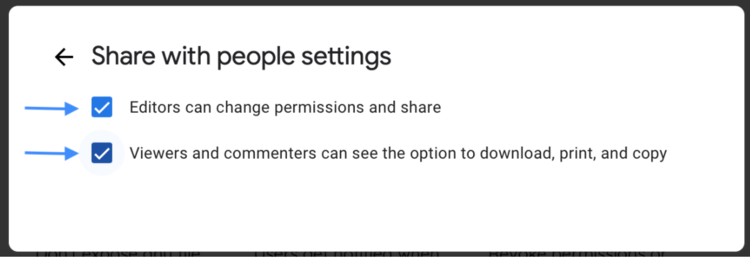
For extra security, disallow people with …
- Viewer or Commenter access to download, print, and copy your shared files.
- Editor access to share your files with others without your consent
- Editor access to change the file’s permission
3. Share files, not folders
Do your collaborators really need access to all files in a folder?
It might be tempting to share a folder as it’s much faster and more convenient than sharing files individually. However, this brings us back to the principle of least privilege.
You may be unaware if there are any files with sensitive data or some other valuable information that could be misused. Let’s face it, it’s unlikely that every single document will be reviewed before sharing the whole folder.
That’s why files should be shared individually. If you absolutely must share a folder then make sure to review its files before sharing, or create a temporary folder with the needed files. As an extra layer of security, you could grant collaborators temporary access.
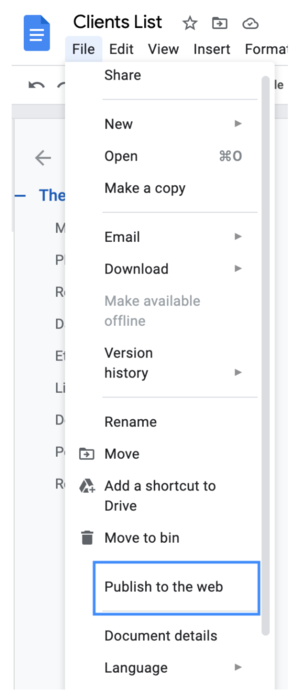
4. What’s public is accessible to everyone!
Would you like your personal information to be accessible to complete strangers?
Like you, businesses need to protect you, your colleagues, their customers, and other data from unauthorized people. Sure, creating a sharable link is much more convenient - but, it essentially puts everyone at risk.
This feature should be disabled by default, but if not, it’s up to you not to publish any files to the web or make any links publicly available (see screenshot) - especially, if they contain sensitive data.
5. Audit and unshare your sensitive documents
Collaboration is great, but that doesn’t mean that others should have external access to your documents.
You know best what you have shared, but that also means that you know best what needs to be unshared.
Identify your sensitive shared files and revoke the collaborators’ access (see screenshot).
File-sharing in Shared drives - 5 best practices
Please note that some of the practices from My Drive can also be used here.
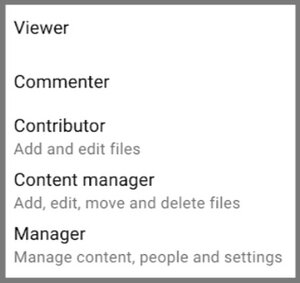
1. Set access levels based on your shared drive's purpose
Choose what kind of access you want to grant members. Each level comes with different abilities. See the image below to understand how those differ.
Like before, choose the access level based on the least privileged principle.
2. Create separate shared drives for external collaborators
When working with external collaborators, create a separate shared drive. By doing so, you prevent third parties from (accidentally) accessing internal-only data.
3. Keep track of your Shared drive’s access permissions
Add [COMPLETED] to a shared drive’s name when a project is completed. Depending on your sharing policy, you can either remove all access to the shared drive or change the members' level of access.
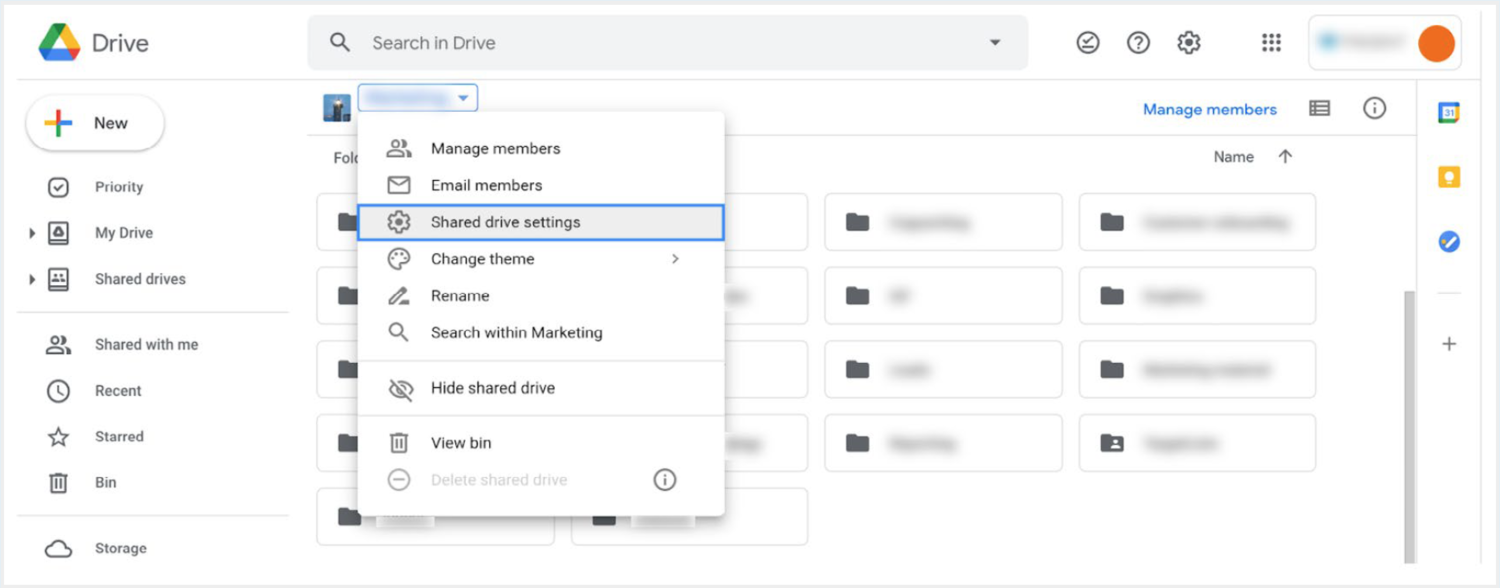
Step 1. Click on the Down arrow next to the shared drive’s name.
Step 2. From the dropdown list, click on Rename.
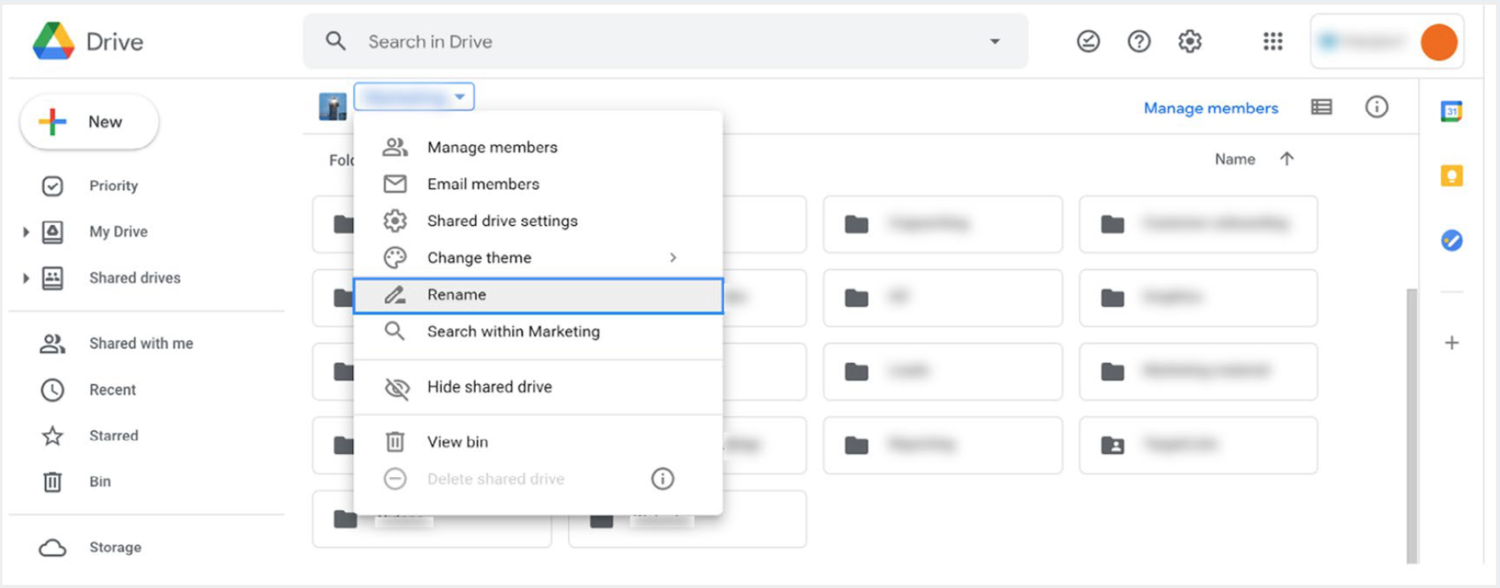
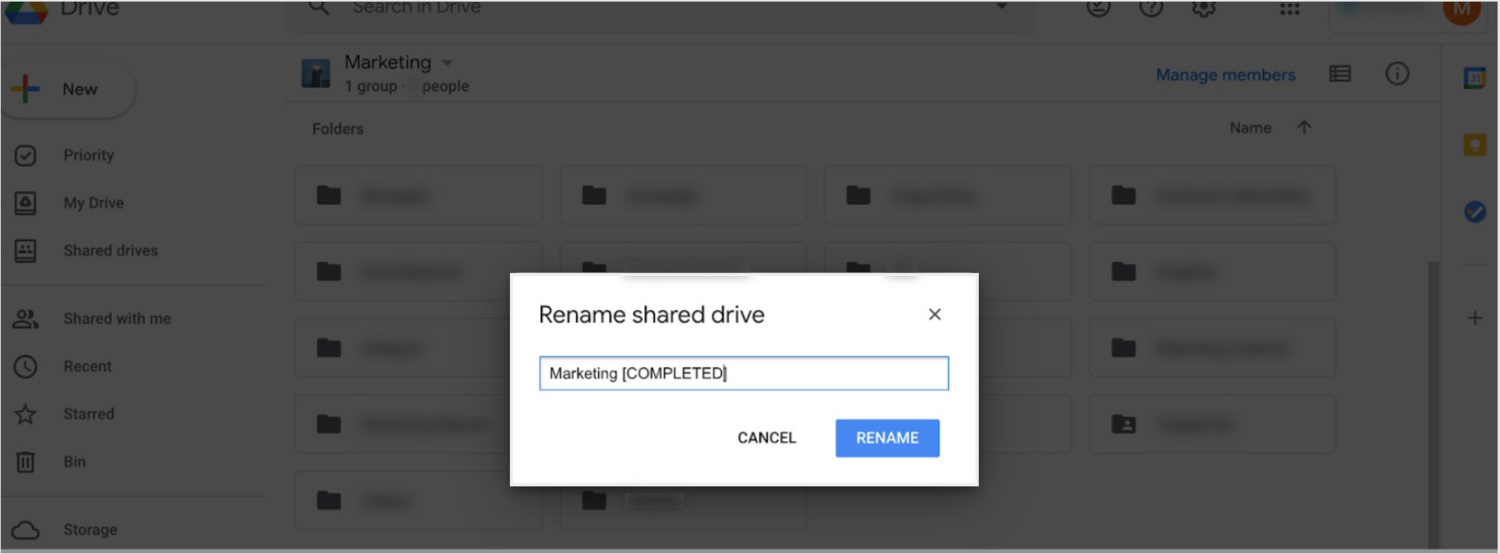
Step 3. Add [COMPLETED] or any other relevant attribute to the shared drive’s name and then Rename it.
4. Remove or modify member access when a project is completed
Once a shared drive project has been completed, it’s a good idea to downgrade members’ access levels, i.e. taking them from Manager, Content manager, or Contributor to Commenter or Viewer or remove them altogether.
Step 1. In the selected shared drive, click on Manage members in the top right corner.
Step 2. Change the access level to the members.
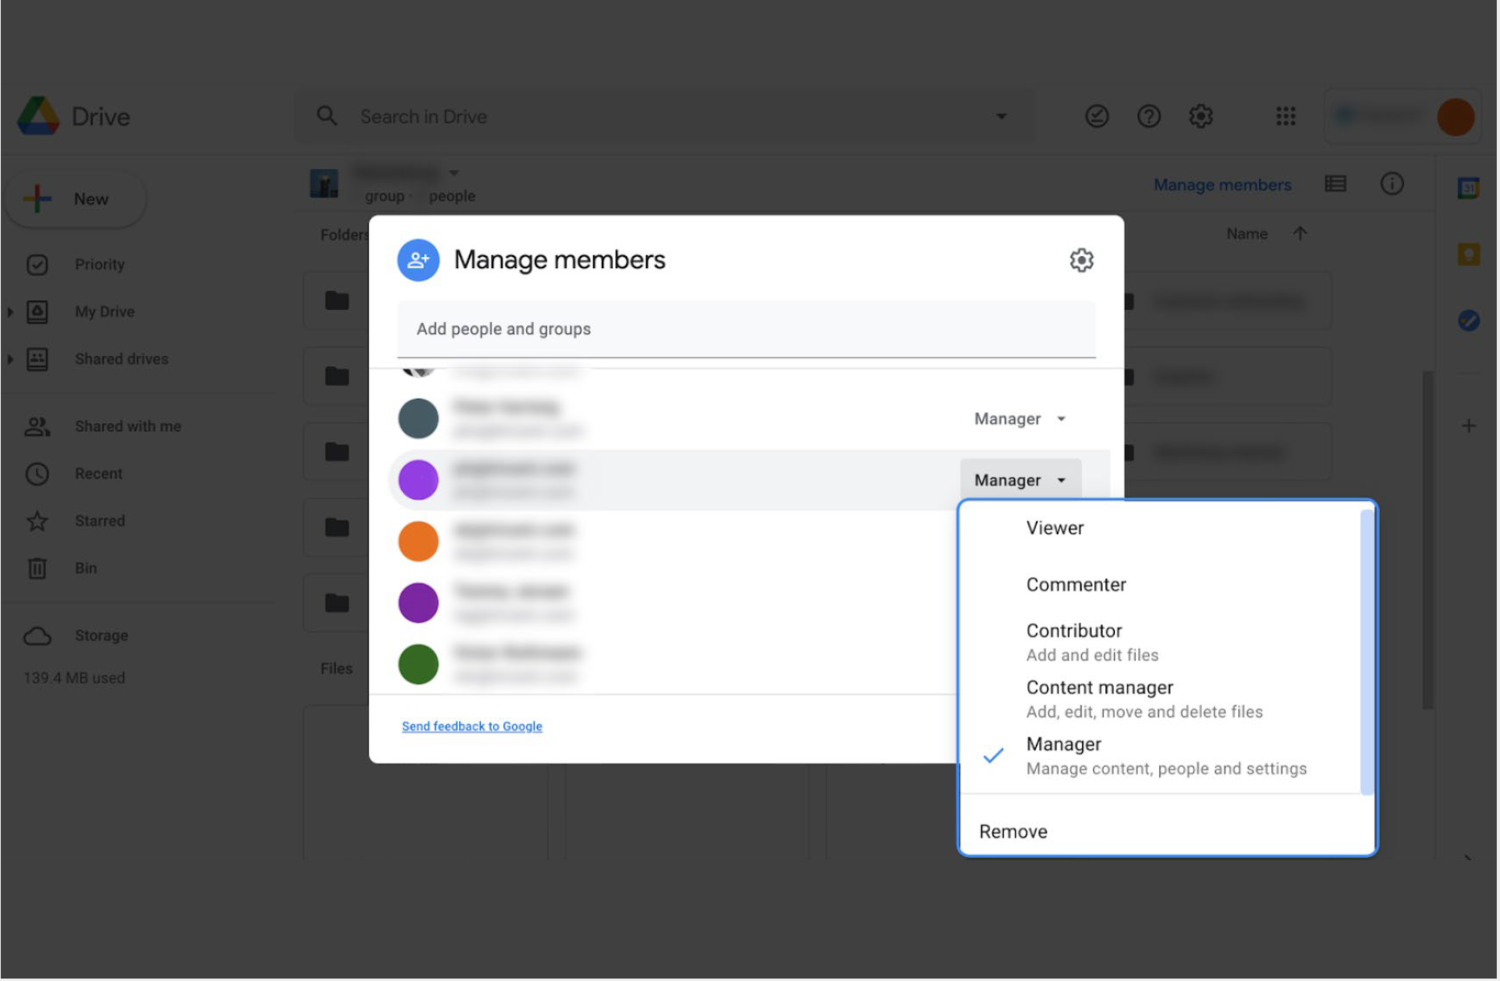
Step 3. Once you modify the members’ access level, click on Done.
5. Change Shared drive settings
A drive and its content should be shared only with the people who need to have access to it. This is why a best practice is to prevent other departments or external parties from accessing the shared drives.
Step 1. On the right side, Click on Shared drives.
Step 2. Click on the shared drive for which you want to edit its sharing settings.
Step 3. Click on the Down arrow next to the shared drive’s name.
Step 4. From the dropdown, click on Shared drive settings.
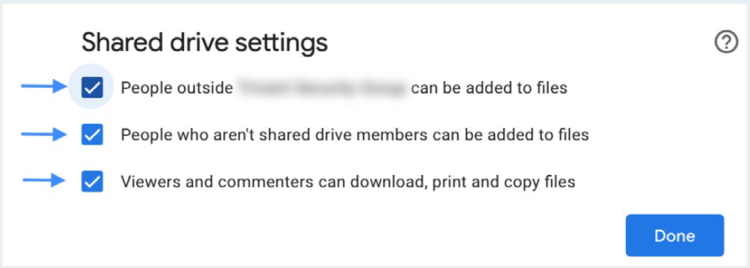
Step 5. Uncheck the options according to your needs.
Step 6. After you have selected the options you want, click Done.


-small.png)